Dear users!
In one of the recent updates of the Ruhavik application, changes have occurred with the display of the server on which it is necessary to configure the unit.
Users who previously set up their trackers do not need to change anything.
For those who create new units or change the settings of old ones, it will be interesting to know that at the moment in the Ruhavik application the server data is displayed in two formats - IP and DNS.
Let’s walk through the steps of creating a unit:
- Define the unit settings and create it. After creating we see the DNS server format by default.
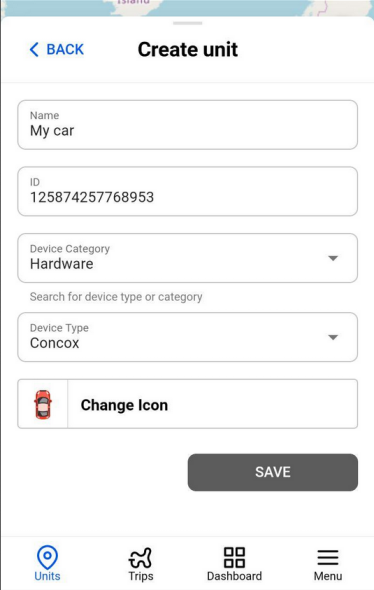
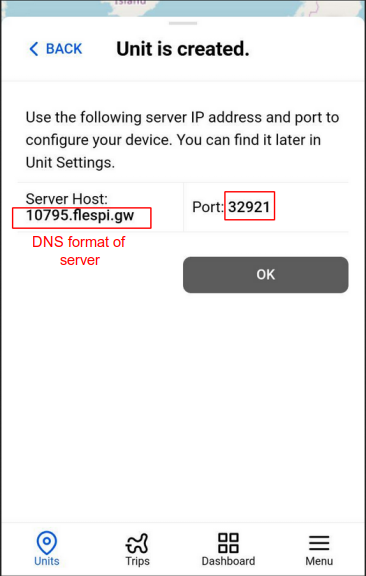
- If your tracker works with this server format, please configure your tracker on the displayed server and port. If your tracker does not work with this server format, then we will move on.
- Now open the unit menu - Settings - Common Settings
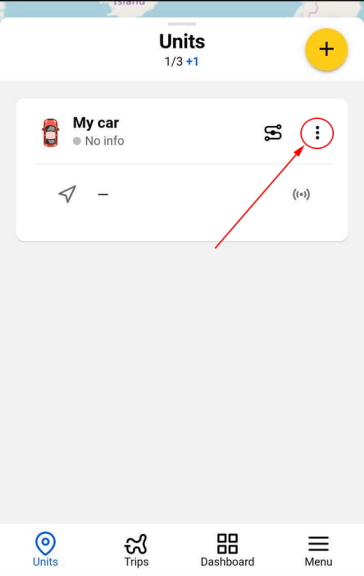
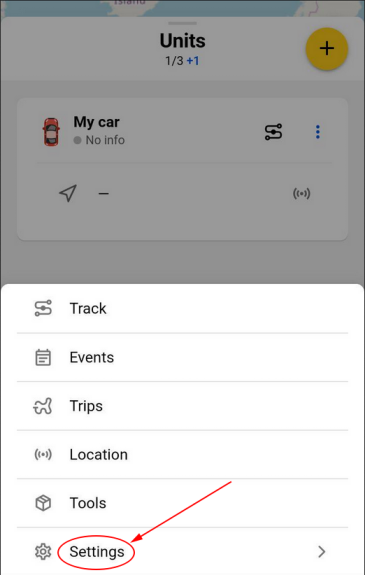
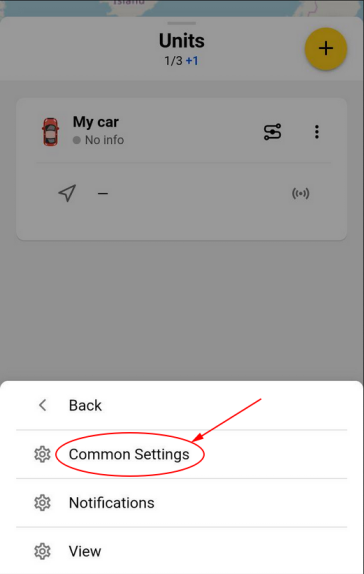
4) Here we also see the DNS server format by default. To display the IP format, please click on the appropriate switch in the application. Now you can configure your tracker on the server and port if your tracker only supports IP format. To see the DNS format again, you can also click the corresponding switch.
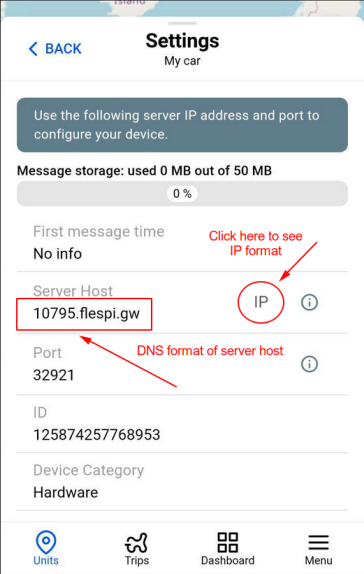
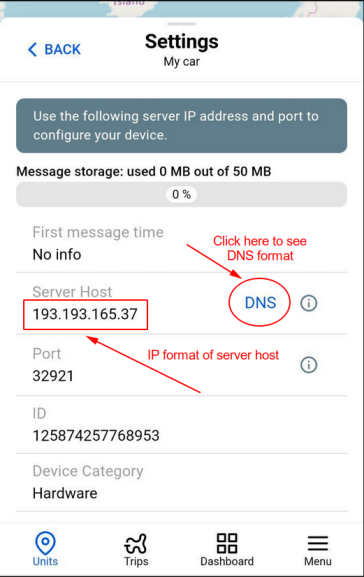
All steps are completed 🙂
We hope this information helps you in setting up your trackers!