Recently, we shared how to track your smartphone using the WiaTag app and monitor its location in the Ruhavik app.
Today, we would like to dive further into this subject and show you how to use the Traccar Client app instead of the WiaTag for similar purposes.
Let’s get started!
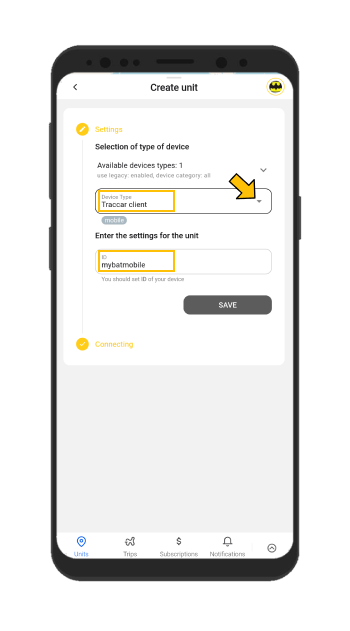
🟡 First of all you should create unit in Ruhavik app:
- When creating a unit in the Ruhavik app, specify the Traccar Client device type.
- In the ID field, enter the unique ID that you will need to specify in the Traccar Client app
- Click on the Save button
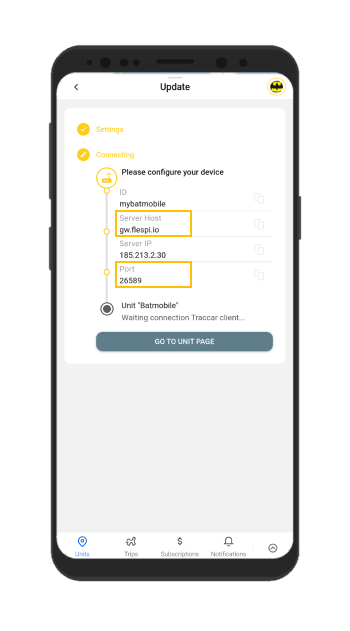
- Then you will see Server host and Port that you need to specify in the Traccar Client app
🟡 Connect Traccar Client to the Ruhavik unit:
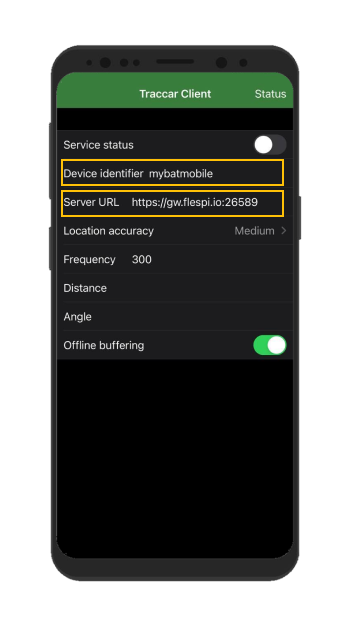
- Install and open the Traccar Client app
- Specify you unit ID in the Device Identifier field
- Enter the Server host and Port of your unit in the Server URL field. Note that in the Server URL field, instead of http, you should enter https.
- If necessary, set up additional parameters such as Location accuracy, Frequency, Distance, and Angle (by default, data is not frequently transmitted).
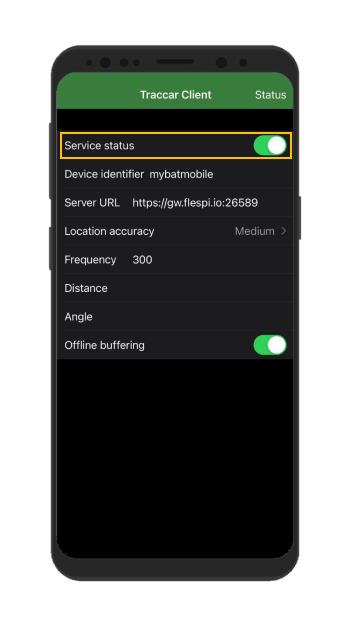
- Turn on Service status
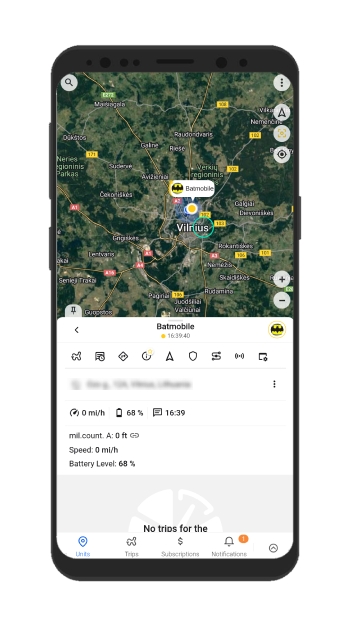
🟡 Experience the result on the Runavik app!
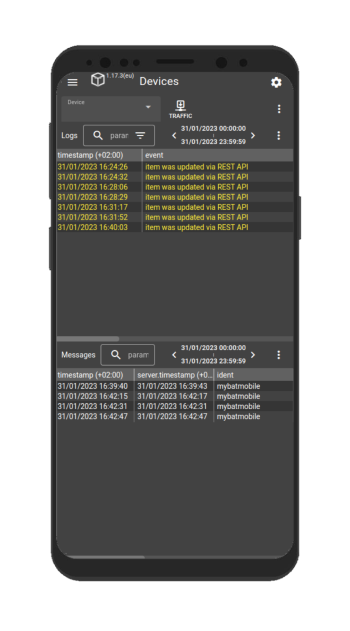
Open the Ruhavik app and confirm that data transmission has started. Additionally, you can open the ToolBox to see the messages being sent from Traccar Client to Ruhavik.
With just a few simple steps, you can turn your smartphone into a tracking device!
Try it out and stay with the Ruhavik app 🙂
Your feedback and suggestions are always welcome on our social media platforms, so don’t hesitate to write to us and share your comments!