Recently, we talked about the integration of Stripe into our CMS for partners - Partner Panel.
Our partners quickly tried out and began using this tool. Just a few weeks after its release, a client of our partner HubLogiQ from the Netherlands made the first payment.
However, we also received many complaints about this feature, despite calling it a full-fledged tool. It turned out (although we knew this initially) that Stripe is available for business in only 46 countries, and in some countries, this tool is accessible to a limited number of people.
Thus, we realized that Stripe alone would not be sufficient for our partners, so we immediately started working on integration with PayPal. PayPal has long become not just an internet service for paying for various goods and services but a full-fledged tool for both businesses and individual users.
—
PayPal integration into Partner Panel is complete!
Now all verified partners have access to this tool.
The operation scheme is similar to Stripe. Now our partners can create payment links for their clients to pay for services via PayPal. As before, the partner can track the payment status and use this information to block or unblock the client.
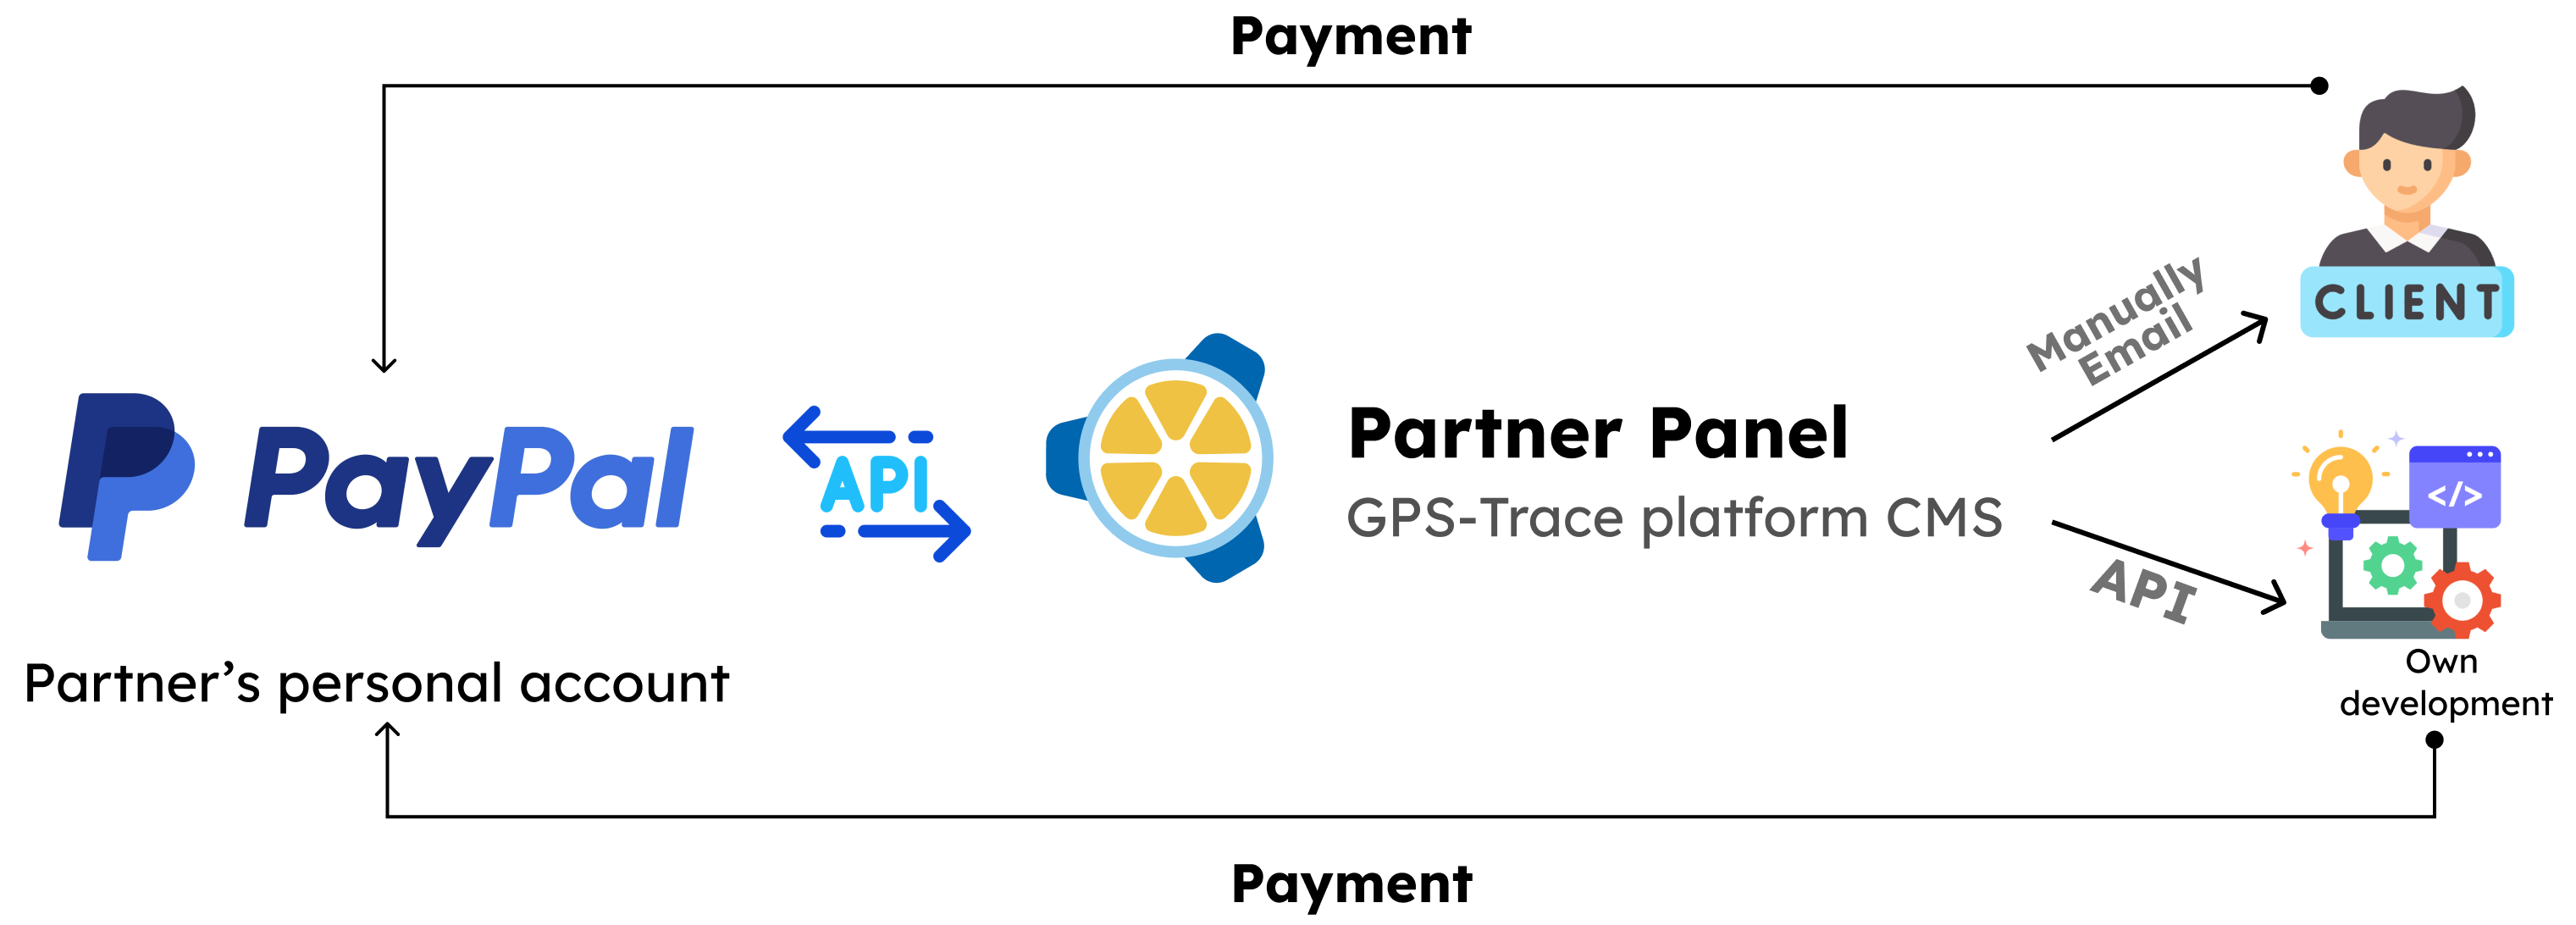
Payment is made directly from the client to the partner’s PayPal account, with Partner Panel serving as a convenience tool for the partner, and no fees are charged on the payment.
—
Now, let’s go into more detail on how to set everything up.
P.S. It’s actually simple, and all step-by-step instructions are also available to each partner directly in the Partner Panel. Just click on the blue question icon in the Partner Panel.
Create a PayPal business account
- Go to the PayPal website and click “Sign Up”.
- Choose “Business Account” and follow the instructions to create your account.
- If you already have a personal PayPal account, you can upgrade it to a business account through settings.
-
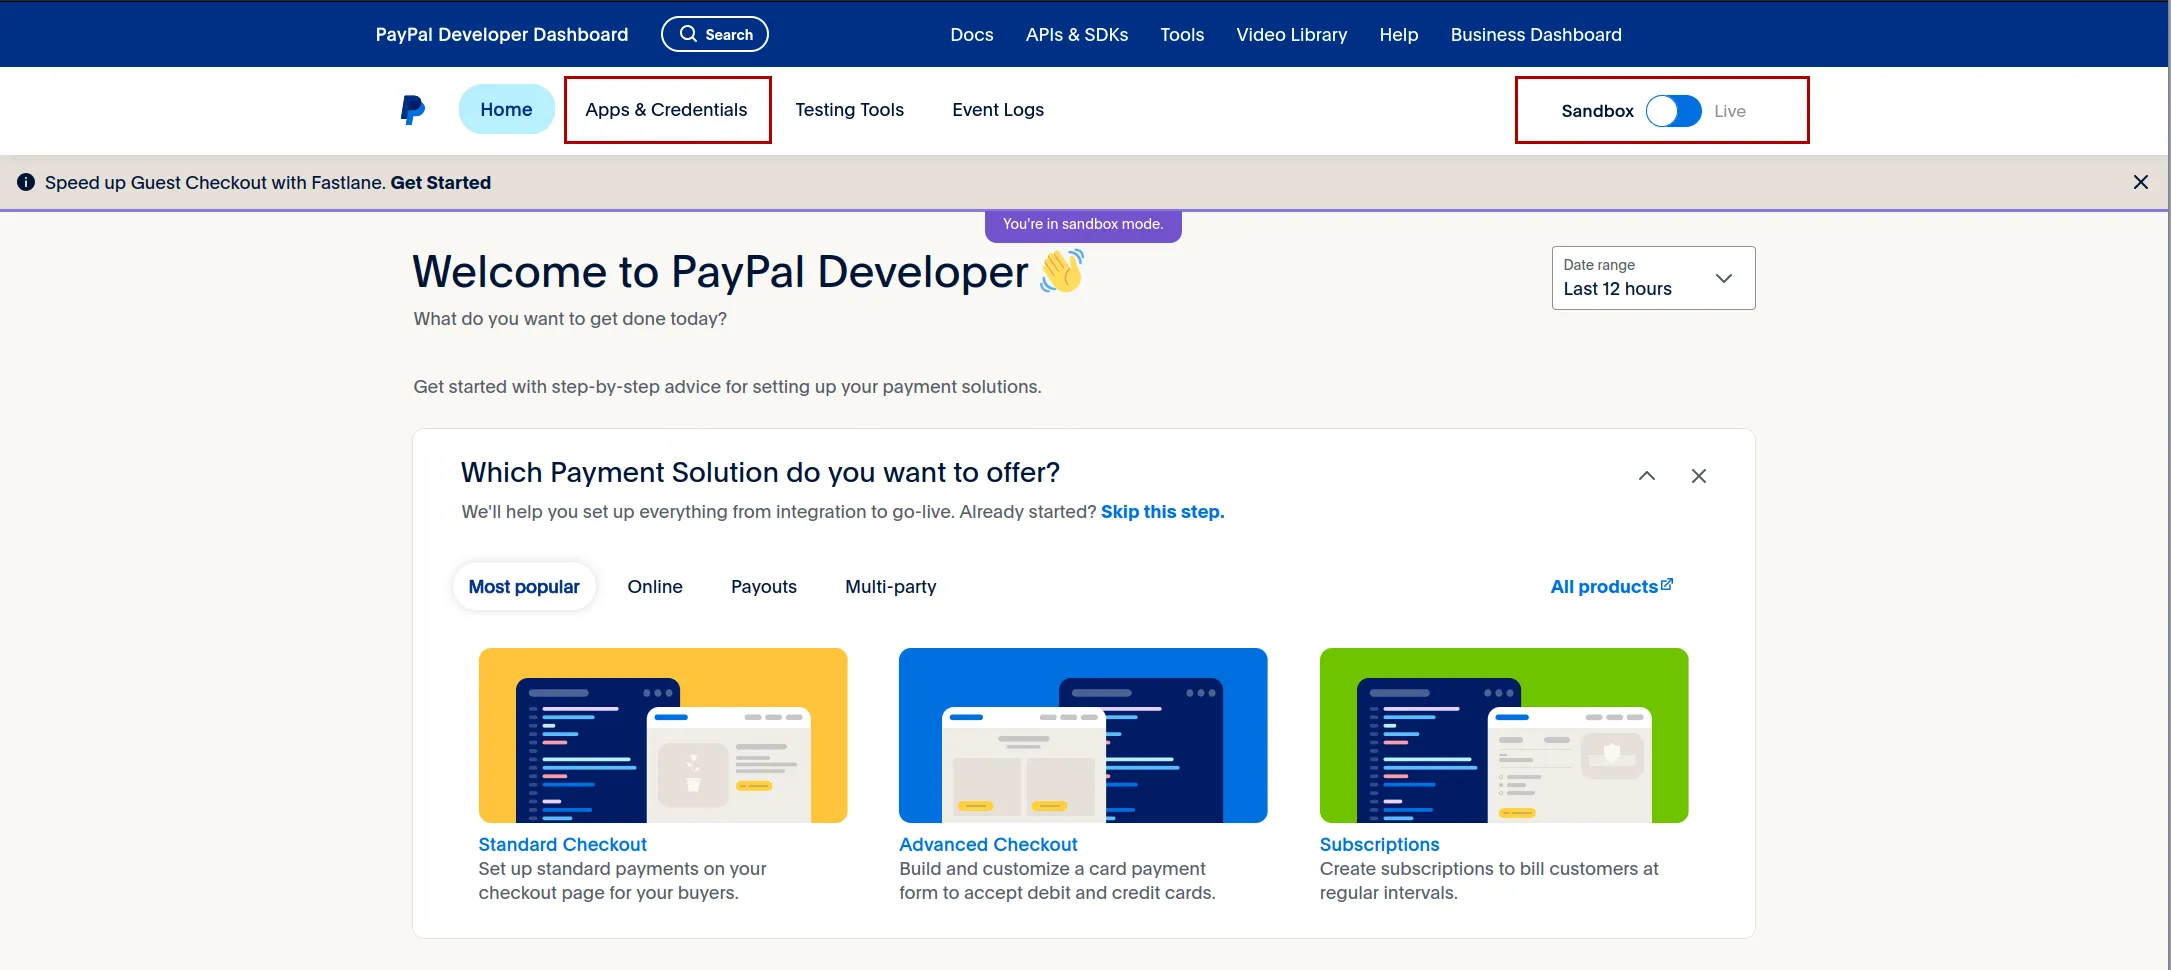
- Go to the PayPal Developer website
- If you already have a PayPal business account, click the “Log In” button and enter your credentials.
- If you do not yet have a developer account, you can register using your PayPal business account credentials.
- After logging in, you will be redirected to the main page of your developer dashboard.
- You will need a business account to manage active applications and handle real transactions.
- In the navigation panel, find and click on “My Apps & Credentials”.
Create API credentials
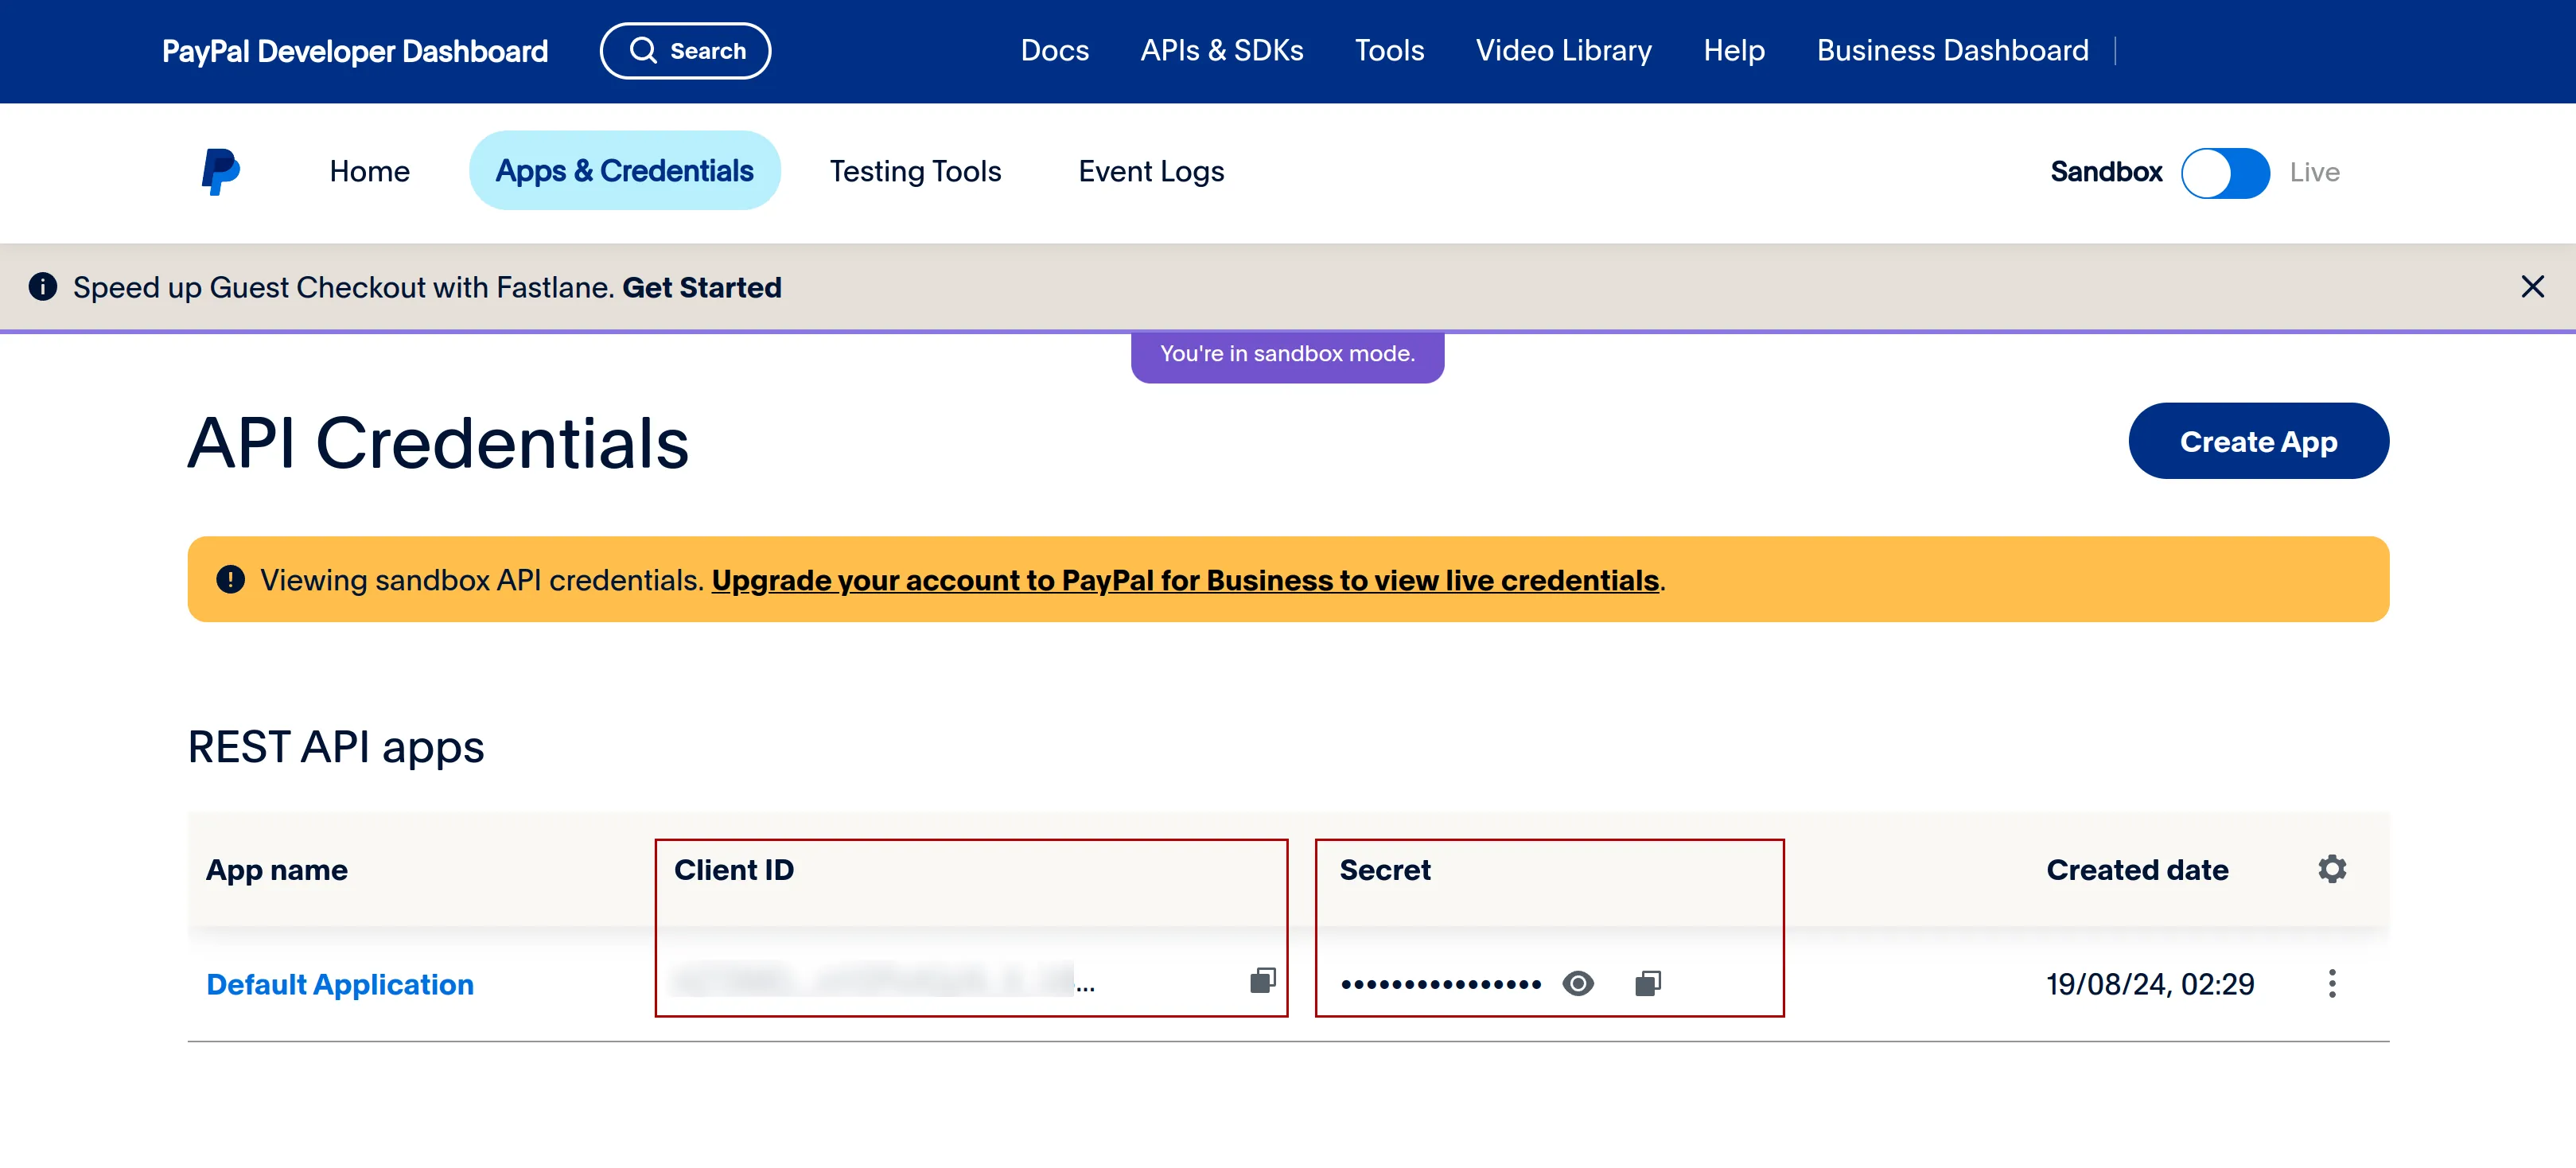
- If you do not yet have an application, click “Create App”. Enter a name for your app and choose between “Sandbox” (for testing) or “Live” (for real transactions).
- If you already have an app, click on its name to view the details.
- In the app details, you will find your Client ID and Secret. These keys are important for integrating PayPal with Partner Panel.
Link the secret key and client ID to Partner Panel
- Copy the Secret and Client ID from the PayPal Developer dashboard.
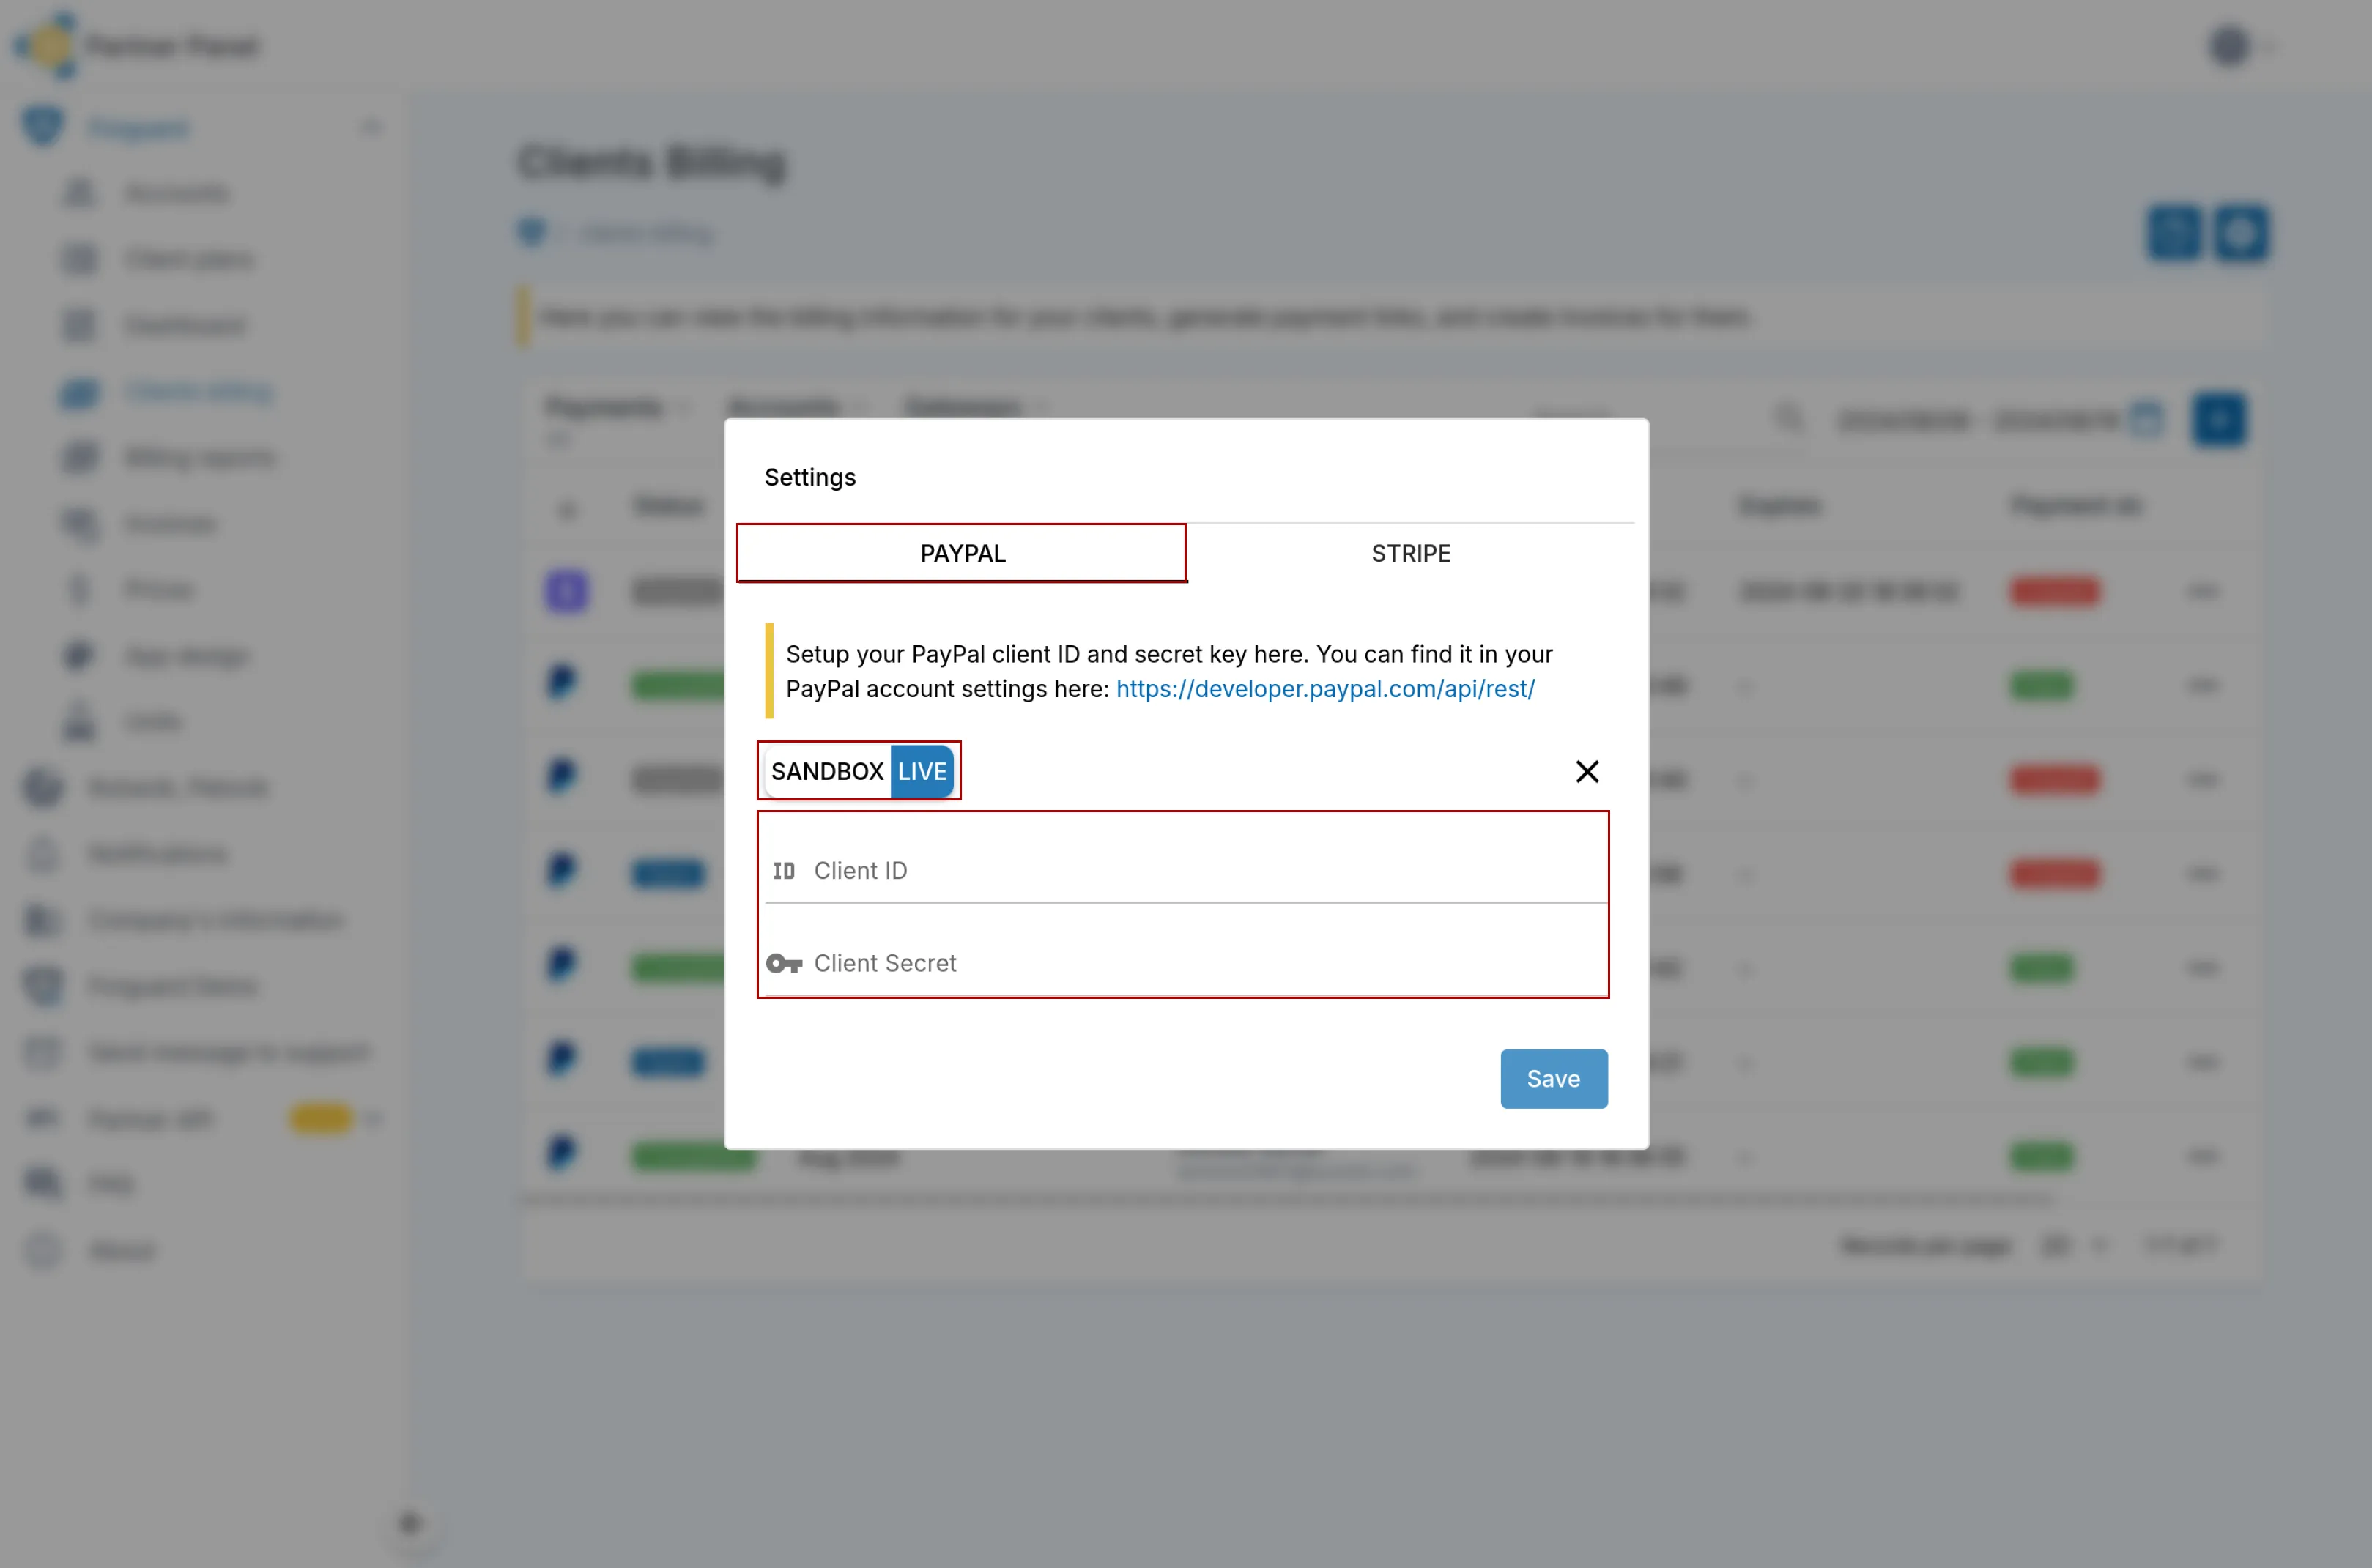
- Log in to Partner Panel and go to the “Client Billing” tab.
- Click on the gear icon on the PayPal client billing tab.
- Paste your Secret and Client ID into the appropriate fields.
- Choose the “Live” mode for real transactions, then click “Save”.
Everything is ready! Now you just need to create a payment link for your client
Let’s say you, a GPS-Trace partner, have a client with 10 vehicles. You want to invoice them for monthly service.
- To do this, you need to Create Payment in the Client Billing tab in your Partner Panel. Enter the invoice name, select the client account, add and name the service, and choose the number of units and the cost.
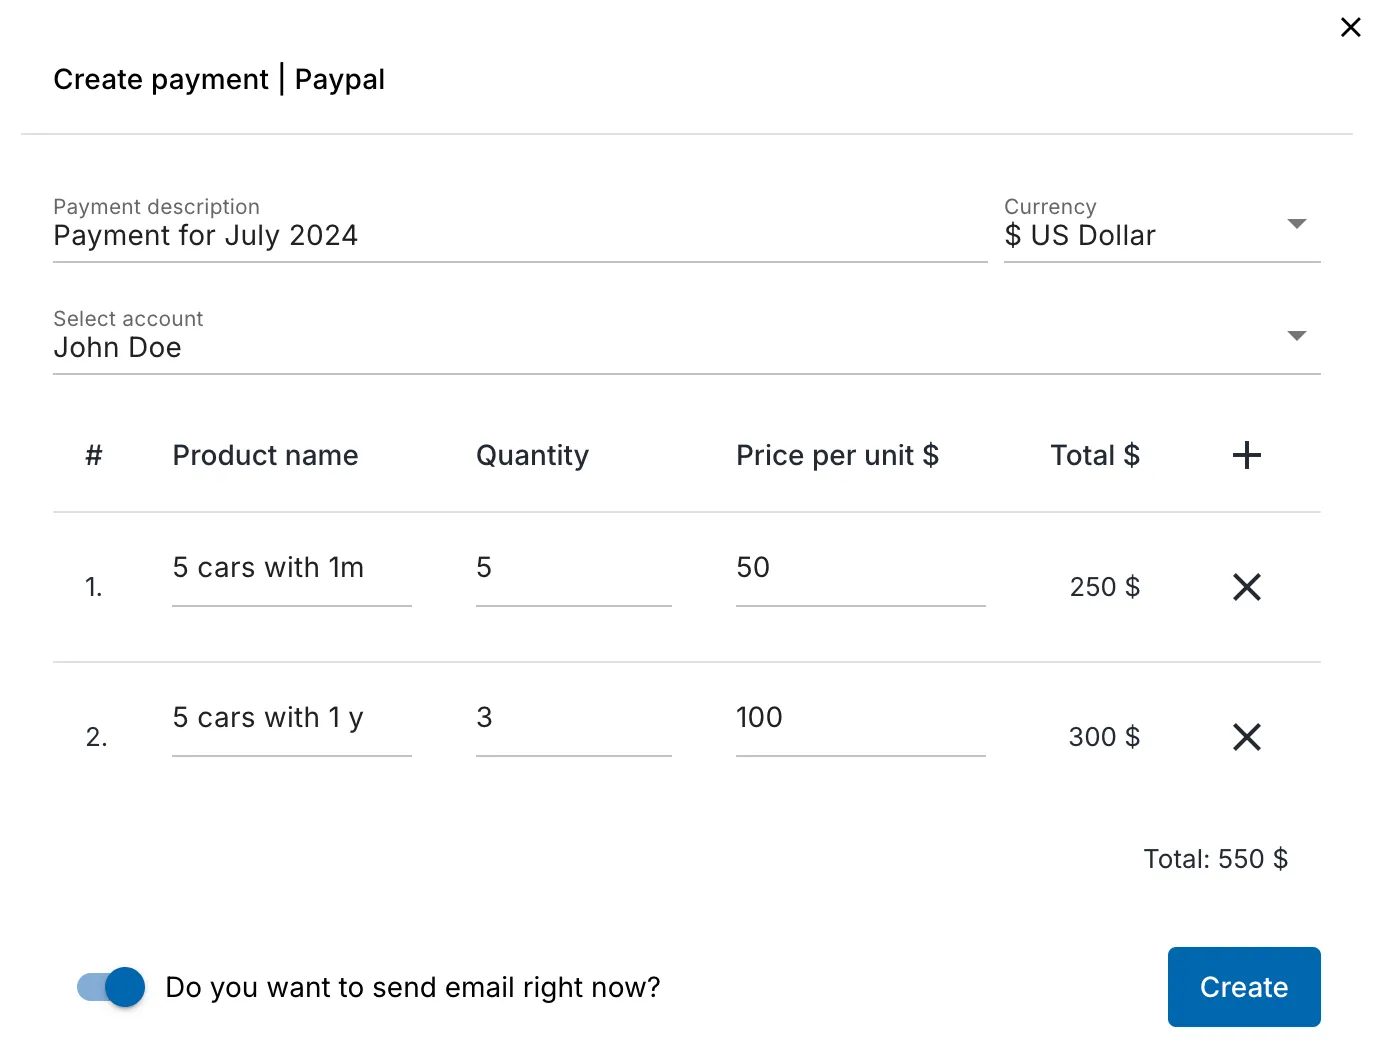
- The payment link can be automatically sent to the client’s email upon creation. Or after creation, you can simply copy the link and send it to the client manually.
This functionality is also available via our Partner API.
Now you can also use this functionality in your own development or other third-party integrations.
As always, we would be happy to receive feedback on the new functionality.
—
Want to try out the Partner Panel functionality?
No problem! Just follow these few steps:
Follow this link
Proceed to registration in the Partner Panel
Fill out the 3 required fields and confirm the specified email address
Log in to the Partner Panel and activate the free trial period.
Instructions on the basic functions of the Partner Panel will be provided after email address confirmation. Additionally, a 5-minute video about getting started with the Partner Panel and its capabilities is available at the link.